
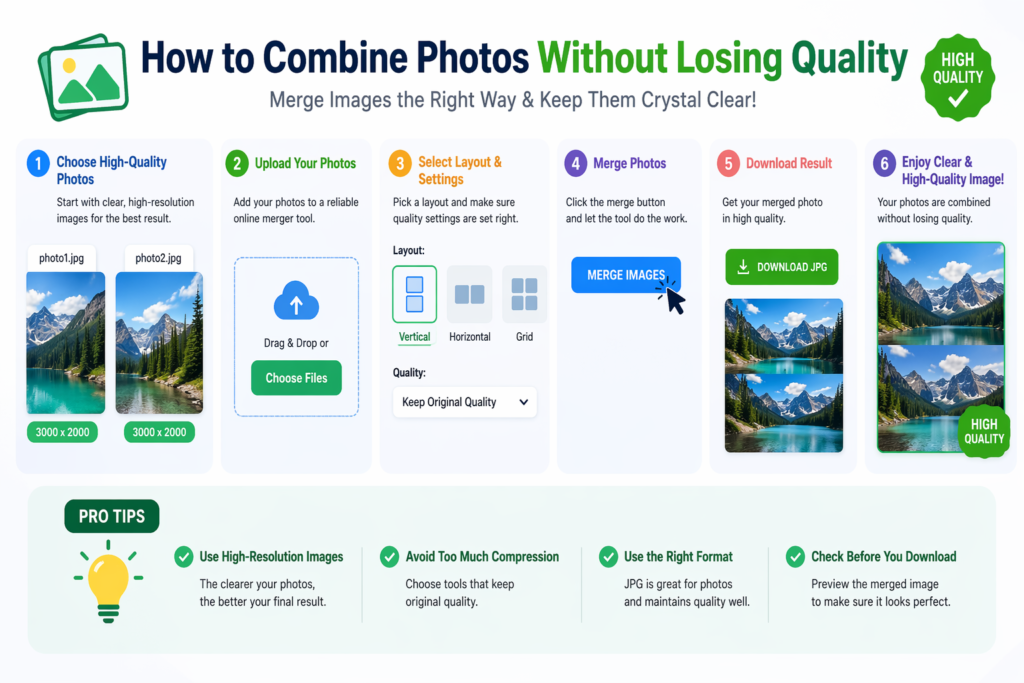
One of the most common concerns people have when merging images is this: will combine photos reduce the quality? It is a valid question. Some tools compress your images, downscale the resolution, or apply lossy rendering that makes the output look blurry or pixelated especially when you zoom in.
The good news is that combining photos without losing quality is entirely possible. It just requires understanding what causes quality loss in the first place, and choosing tools and settings that avoid those pitfalls. This guide covers everything you need to know.
Why Do Photos Lose Quality When Combined?
Quality loss during image merging usually comes from one of four sources:
1. Re-Compression
JPG is a “lossy” format, meaning every time a JPG is saved, some data is discarded to reduce file size. When you merge two JPGs and save the result as another JPG, you are compressing the image again adding another round of data loss on top of any previous compression. The more times an image is re-saved as JPG, the more degradation accumulates.
This is called generation loss, and it is the most common cause of visible quality reduction in merged photos.
2. Downscaling During Processing
Some image tools reduce the resolution of your images during processing either to save server resources or because they are designed for web display rather than full-resolution output. If a tool quietly downscales your 4000px wide photo to 1200px during the merge, you will lose sharpness that cannot be recovered.
3. Mismatched Dimensions
When you combine photos of different sizes, some tools automatically scale one image to match the other. Depending on the direction of scaling (upscaling vs downscaling) and the algorithm used, this can introduce blur, artifacts, or pixelation.
4. Wrong Output Format
Saving a merged image in a highly compressed format (like a low-quality JPG) when the source images were high-quality will always result in quality loss. Format and compression settings matter more than most people realize.
Understanding the cause of quality loss is the first step to preventing it.
How to Combine Photos Without Losing Quality
1. Use Images at Their Native Resolution
Before combining, make sure you are working with the highest quality version of each photo. Do not use images that have already been compressed for web or social media use the originals from your camera, scanner, or storage drive.
If you have both a compressed version and an original of the same photo, always use the original for merging.
2. Match Dimensions Before Merging
If you are combining images of different sizes, manually resize them to consistent dimensions before uploading. This prevents the merge tool from making automatic scaling decisions that could reduce quality.
For a horizontal merge, make all images the same height. For a vertical merge, make all images the same width. Use a consistent pixel value that matches your highest-resolution source image do not reduce everything to match the smallest file.
Pro Tip: Use free tools like Windows Paint, Mac Preview, or GIMP to resize images before merging. Set dimensions in pixels, not percentages.
3. Choose a Quality-Preserving Merge Tool
Not all online tools treat your images equally. Some automatically compress output to reduce server load. When evaluating a merge tool, look for these quality indicators:
- Explicitly states it preserves original resolution
- No automatic compression or downscaling mentioned
- Allows you to choose output format (JPG, PNG, PDF)
- Offers a full-resolution preview before download
MergeJPG.com is built to maintain the original resolution of your uploaded images throughout the merge process. The output preserves the pixel dimensions of your source files it does not quietly reduce them.
→ Try it free: Merge Photos at Full Resolution — MergeJPG.com
4. Export as PNG if Quality Is Critical
PNG is a lossless format it does not apply compression that discards data. If you are merging images where quality is absolutely non-negotiable (product photography, medical imaging, archival scans, design mockups), export the merged result as PNG rather than JPG.
The trade-off is file size. A PNG will be noticeably larger than a JPG at the same dimensions. For web use, that matters. For offline storage or professional delivery, PNG is worth it.
5. If Using JPG, Choose High Quality Settings
If you need to output as JPG (for example, to keep file sizes manageable), make sure the quality setting is as high as possible. Many tools use a quality setting of 75–80 out of 100 by default. Push this to 90–95 for noticeably better results.
MergeJPG.com outputs JPG files at high quality settings to minimize generation loss while keeping files manageable.
6. Avoid Merging Already-Compressed Images Repeatedly
Every time you open, edit, and re-save a JPG, you add another layer of compression damage. If you know you will need to make multiple edits to a merged image over time, keep a working copy in PNG or TIFF format and only export to JPG when you are fully done.
The workflow looks like this: merge your original JPGs into a high-quality output, save that output as PNG for future editing, and only produce a JPG version when you need to share or upload the final result.
Does Merging Online Reduce Quality Compared to Desktop Software?
This is a common misconception: that desktop software like Photoshop preserves quality better than browser-based tools.
In practice, quality is determined by the output settings not whether the tool runs in a browser or on your desktop. A browser-based tool that outputs at full resolution with minimal compression will produce results equal to or better than desktop software with poorly configured export settings.
The real questions are: what resolution is the tool working in? What compression is it applying? What format options does it offer? If a browser-based tool answers these correctly, it will match desktop quality for typical merging tasks.
How to Check If Your Merged Image Has Lost Quality
After merging, do not just glance at the thumbnail. Here is how to properly verify quality:
- Open the merged file and zoom into 100% (actual pixels, not fit-to-screen)
- Look at fine details text edges, hair, fabric textures, sharp lines
- Compare against one of the original source images at the same zoom level
- Check the file dimensions: right-click the file and check properties or Get Info
- Check file size an unusually small file size often signals heavy compression
If the merged file dimensions match your expectations and the detail at 100% zoom looks sharp, you have preserved quality successfully.
Real-World Scenarios and Best Approach
Scenario: Combining scanned document pages
Best approach: Scan at 300 DPI or higher. Merge using a tool that supports PDF output for clean, printable documents. Alternatively, merge to high-quality PNG for archive storage.
Creating a before/after photo comparison
Best approach: Use original photos at the same resolution. Merge horizontally. Export as high-quality JPG or PNG. Resize after merging if needed for web publishing not before.
Combining product photos for an online store
Best approach: Use studio photos at full camera resolution. Ensure consistent dimensions across all product images before merging. Export as JPG at 90+ quality for web, or PNG for print.
Merging screenshots for documentation
Best approach: Screenshots are typically already at screen resolution (72–144 PPI). Merge vertically. PNG output is ideal since screenshots often contain text and sharp UI elements that benefit from lossless compression.
Key Rules for Zero Quality Loss
- Start with the highest quality originals you have
- Match dimensions before merging to prevent automatic scaling
- Use a tool that preserves full resolution like MergeJPG.com
- Export as PNG for critical work, high-quality JPG for general use
- Avoid repeated re-saving of JPGs keep a lossless master file
- Verify output by checking file dimensions and zooming to 100%
Quality preservation starts with your source files and the settings you choose not magic from the tool. Get these right and your merged image will be indistinguishable from the originals.
Start Combining Photos for Free
Ready to merge your images while keeping full quality? MergeJPG.com handles the process in seconds — with no compression tricks, no watermarks, and no account required.
→ Try it free: Merge Photos Free — Full Quality, No Sign-Up